Xray
XRay is one of the leading test management tools. Integrating XRay with Atlassian's Jira software is a powerful feature that allows for the automatic creation of Jira tickets based on security threat violations identified by XRay. As DevOps teams are already familiar with Jira's workflow and user experience, this integration streamlines the handling of XRay detections. Once configured, policy violations will appear as notifications in Jira, enabling your team to pinpoint where violations are found, prioritize them, and take immediate action to resolve them.
The Test Maker framework now offers the ability to use XRay with automated tests and to generate and download test execution results automatically, without manual intervention. Configuration, execution, and step-by-step analysis.
Prerequisites: Follow the step described in the XRay documentation (already completed).
Step 1 - Create the task (or item or subtask).
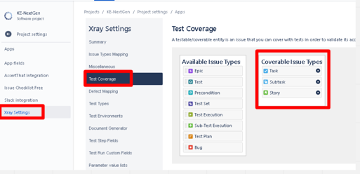
 Make sure this type of issue is added to the "Recoverable Issue Types".
Project Settings > Apps > Xray Settings:
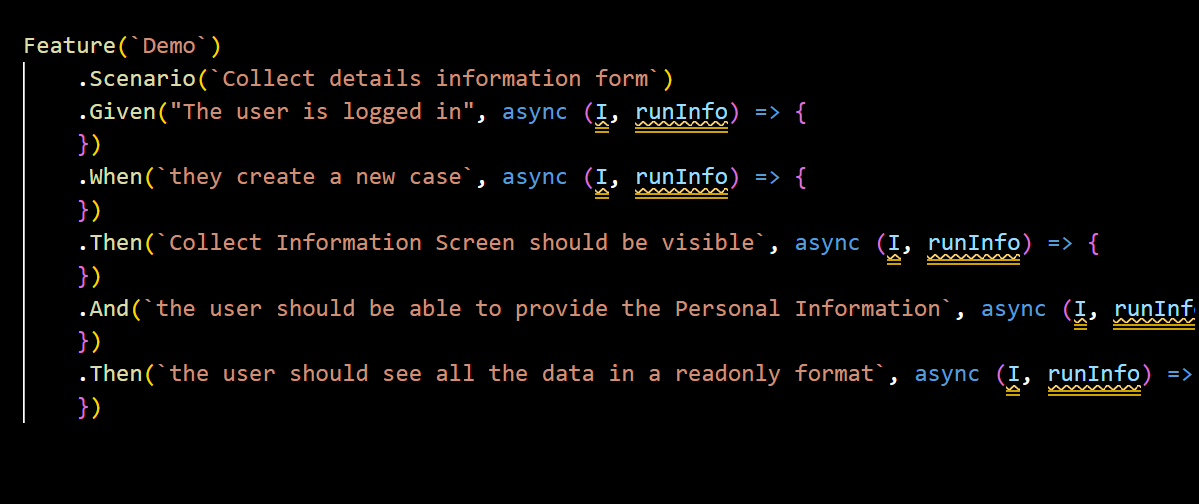
Step 2 - Create the test (or tests) in BDD style (Test Type- Cucumber). The scenario name in Test Maker must match the test type task name in Jira, and the Feature in Test Maker must have the same name as the User Story.

After the creation of the test type issue, it should match the same Gherkin steps described in the Test Maker feature.
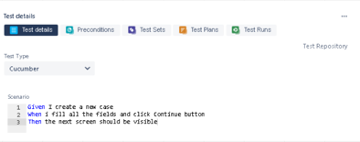
Each test task must contain only one test scenario - this is important, and it's a limitation in Xray.
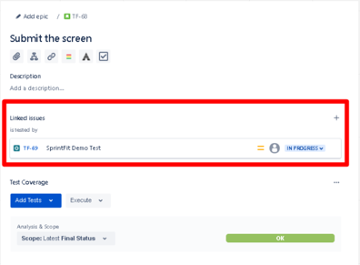
Step 3 - Link your tests to your issue type. The feature name for the test case to be tested will be taken from the linked issue type.
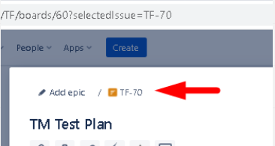
Step 4 - Create a test plan for tasks in Jira and add all tests you want to execute to this test plan (can be done via Search).
 All features will be downloaded by Test Maker from this test plan, so the above step is very important.
Step 5 - You can now use the task number in Jira's test plan as the KEY for all your tests (all in lowercase, e.g., TF-70 => tf-70). If the key is incorrect, Test Maker has no way to set it, so double-check that the key is correct.
Step 6 - TM configuration (must be placed in the configuration file). The Client secret and client id must be generated per user in Jira: Global Settings: API Keys - Xray Cloud Documentation - Xray. The keys correspond to the test plan task number in lowercase (step 5).
plugins: [
    {
        ...plugins.integration.xray,
        ...{
            options: {
                clientId: `<clientId>`,
                clientSecret: `<clientSecret>`,
                apiUrl: `https://xray.cloud.getxray.app/api`,
                apiVersion: `v2`,
                featuresFolder: `./features`,
                keys: [
                    `<test_plan_task_name_from_jira>`,
                ],
                autoDownload: true,
                autoUpload: true
            }
        }
    }
]
Step 7 - Run your tests!
Step 8 - Now you can check your test results in Jira. At each execution, a new execution result is created in Jira (you can only disable it in the TM configuration file or pass it as a parameter).
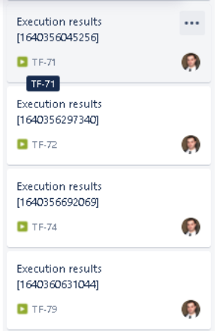 (You will see the notification containing the Jira task number of the execution results in the terminal after running all defined tests).
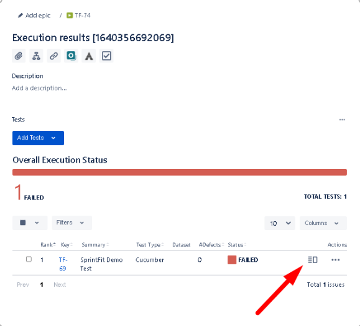
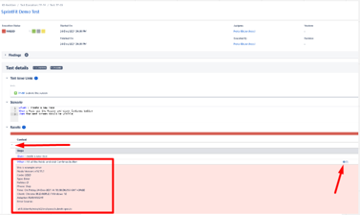
Step 9 - Open the execution result you need and check all details (error message if any) and attached screenshot (evidence):
Error Handling:
The X-Ray TM plugin has a retry mechanism. If there are problems or errors, you can see the error message up to three times, for example:
 (The key is incorrect)
If the clientId or clientSecret value is incorrect, retrying is not applied:
![]()
XRay documentation can be found here.