Jenkins Integration
Test Maker runs in all CI environment the same. Test Maker can integrate with Jenkins.
Installation
Test Maker has to be installed first. We invite you to consult how part dealing with Test Maker installation.
You need to install Test Maker with a shell script.
Delete package-lock.json file.
rm -rf ./package-lock.json
Delete node_modules folder.
rm -rf ./node_modules
Install the dependencies.
npm install
Start test execution with specified configuration file.
npm run test:ci
or with an example of variable usage:
Start test execution with specified configuration file and two variable sourceName and parallelFeatures.
npm run test:ci -- --source "$sourceName" --parallel.features=$parallelFeatures
GUI requirements
headless mode
By default, when running Test Maker with Jenkins, no Graphical User Interface (GUI) is present. That's why the test execution will be done in headless mode. The Test Maker configuration will then have the headless option enabled and set as true
const testMakerCIConfig: Configuration = {
    runner: {
        headless: true,
    },

};
export default testMakerCIConfig;
headful mode
It is possible to run tests in headful mode, by adding a virtual screen to your jenkins configuration. For example you can use Xvfb plugin to run your tests that require GUI.
You need to enable the option inside the Build environment section of your job configuration.

You can specify the virtual screen size with the following shell command:
xvfb-run -a -s "-screen 0 4000x2000x24"
const testMakerCIConfig: Configuration = {
    runner: {
        headless: false,
    },

};
export default testMakerCIConfig;
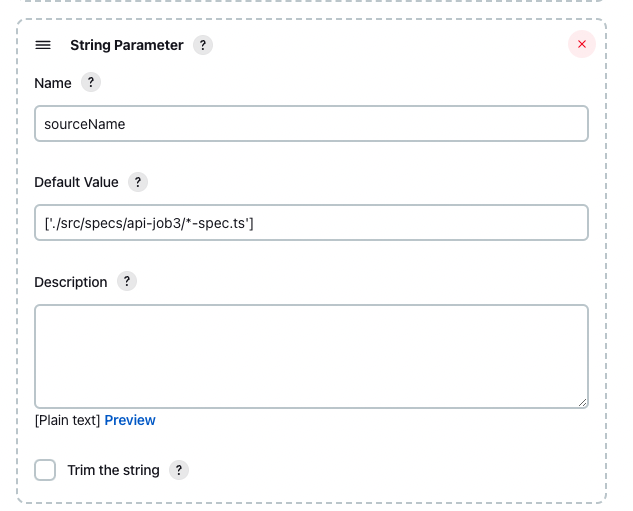
Parameters usage
You can use parameters to handle different part of the configuration from the platform directly.
For example, you can parametrize the number of parallel threads or the test suites that you'd like to execute.
![]()


Source control
For source code management,if you are intent on pulling your test project from a version control platform. You will need to provide at least credentials to access the repository and url of the repository.
Here are some links leading to version control platform websites explaining how to integrate with Jenkins.
Bitbucket
https://plugins.jenkins.io/atlassian-bitbucket-server-integration/
Github
https://www.jenkins.io/solutions/github/
Gitlab
https://docs.gitlab.com/ee/integration/jenkins.html
Reporting
All Test Maker reporters are available on any CI system. For some of them you need to have extra configuration of your CI system.
Logs
Test Maker terminal reporter is your logging utility in your CI system. You can then have logs about Test Maker process ,errors,etc...
Plugins
Here are the minimum three plugins that should be installed in your jenkins environment:
Allure

AnsiColor

NodeJS

System requirements
In order to execute Test Maker, you need to install in your CI environment
ANSI support for login
Here is a list of the dependencies that will be installed with Playwright. specific dependencies
Default Test Maker configuration
By default, Test Maker comes with a ci configuration.
test-maker.ci.ts
import { Configuration, reporters } from "test-maker";

const testMakerCIConfig: Configuration = {
    runner: {
        liveMode: false,
        headless: true,
        timeout:{
            selector:10000,
            assertion:12000
        }
    },
    reporting: {
        reporters: [reporters.terminal, reporters.allure],
        screenshots: {
            enabled: true
        }
    },
};
export default testMakerCIConfig;
It's also recommended to add the following options to the configuration file:
const testMakerCIConfig: Configuration = {

    debugging:{
        enabled:false,
    },
}
In order to deactivate debugging mode as to avoid having hanging execution in debugging mode inside your pipeline.