Recorder
The Test Maker recorder enables you to create test specifications for web testing by recording your actions in the web browser and translating them into Test Maker API commands. The recorder is designed to be non-destructive, allowing you to edit the recorded code while keeping the recording browser open.
How to use the recorder
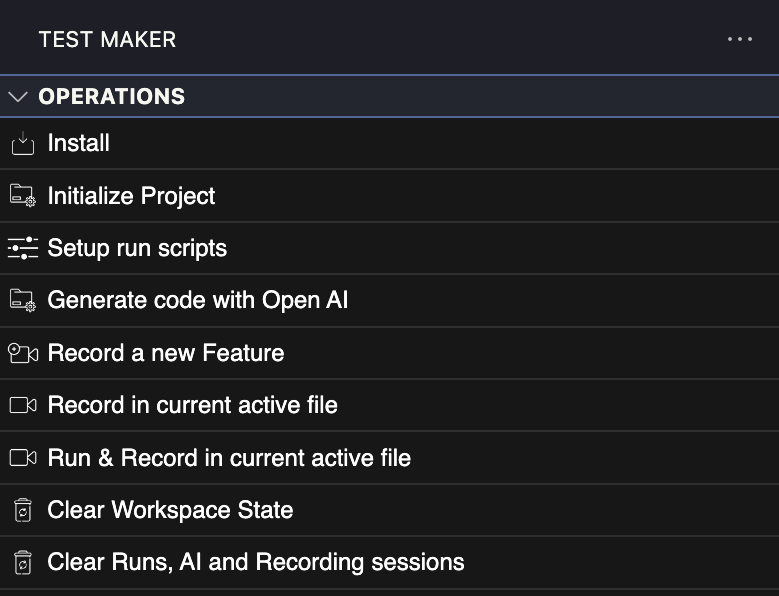
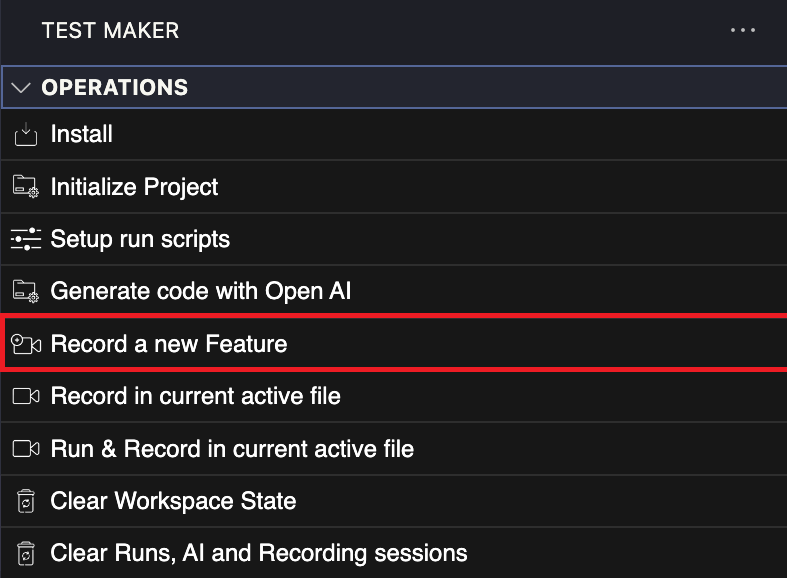
To create a new feature file, click on "Record a new feature." Provide a name for your new feature file, and it will be displayed in your project file tree.
Record a new Feature
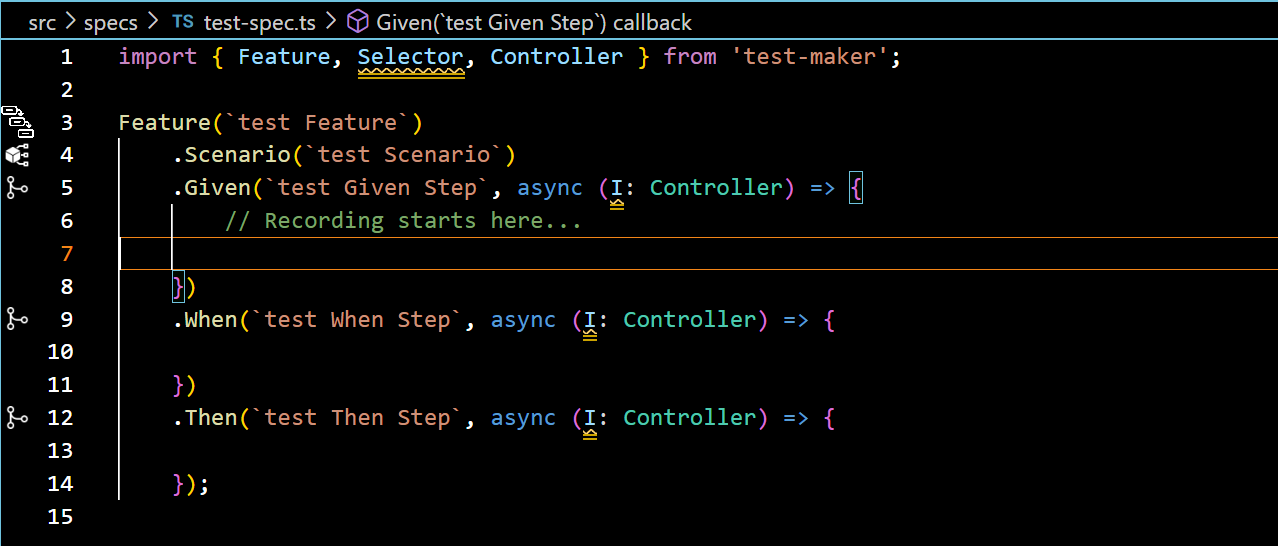
Note that recording can only be done when your cursor is located inside a step. Please refer to the Gherkin, file for more information on steps.
To start recording in an existing feature file, click on "Record in the current active file" (assuming you have opened the designated file). This will open a terminal and initiate a recording session with the web browser displaying a blank page. In the browser's navigation bar, enter the URL of the website you want to access.
Record in the current active file
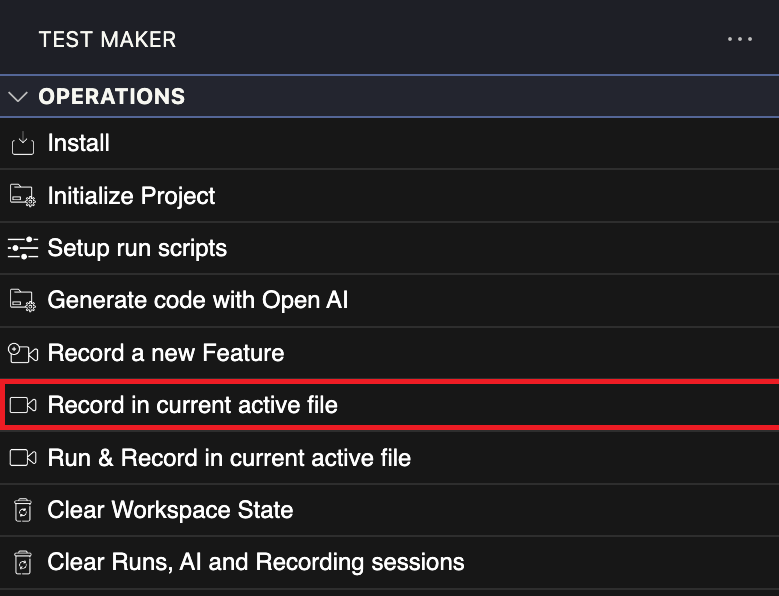
Start a recorder session opening a browser where you can record actions inside the currently opened/active spec file.
Run & Record in the current active file
Start your test execution of the currently active file as any other test. Whenever you enter debugging mode, you will be able to record your actions within the active file. This feature allows you to mix test execution and recording. Please keep in mind that any error occurring during the test execution might prevent you from switching to the recording part, depending on your failure settings. You can then write your test more easily, and even enter debugging mode several times during your test execution. This hybrid mode is designed for more flexibility. Recording and Higlight mode are automatically switched to manual and the recording starts in the last step by default , you will have to manually adjust the cursor position if you want your code recorded at another location.
You can make the recorder panel appear and focus an element by pressing the keyboard shortcut put in Show/Hide Shortcut option. (By default you need to press Shift key twice rapidly)
Recorder Panel
When you start a recording session and access a website, the Test Maker recorder panel will appear.
The recorder panel is your main tool during the recording process. For each recorded action, you will see a green notification message at the top of the browser window, confirming that the actions were recorded successfully. If, for any reason, actions were not recorded, a red notification message will be displayed to alert you.

-
Collapsed mode: You can click on the minimize button at the top right of the recorder panel to have it collapsed into a thin bar, as shown above. You will have to click on the same button to have it expanded back. You can achieve the same results by simply double-clicking on the very top of the recorder panel, whether it is collapsed or expanded. You're still able to highlight or record some actions depending on your settings in the collapsed mode.
-
Standby mode: You can click on the close button to enter standby mode; the recorder panel will no longer be visible, but you will see a Test Maker icon on the bottom right of your web browser. The said icon will be surrounded by either a green light, meaning that your recorder is online and working, or in red, indicating a connection issue with Visual Studio Code. By clicking on it, you can reopen the recorder panel. Please keep in mind that recording/highlighting is not possible in standby mode.
![]()
You can make the recorder panel appear and focus an element by pressing the keyboard shortcut put in Show/Hide Shortcut option. (By default you need to press Shift key twice rapidly)
Recording Mode
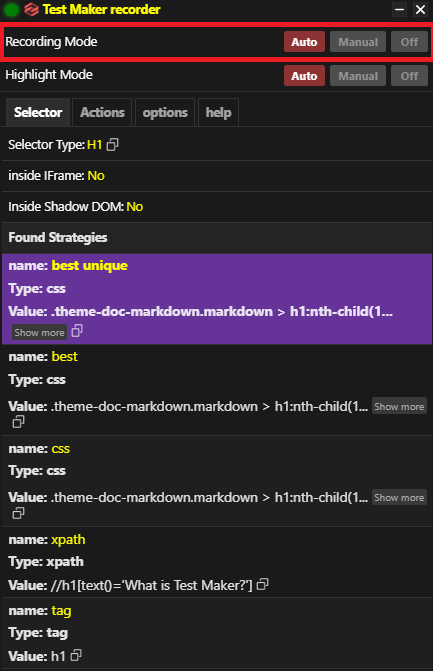
You can set the recording mode within the panel:
-
Auto: Your actions are automatically recorded and translated into commands.
-
Manual: You have control over which actions to record and translate into your feature file. If you interact with a selector during the action, it will be included in the generated code.
-
Off: None of your actions are recorded.
Highlight Mode

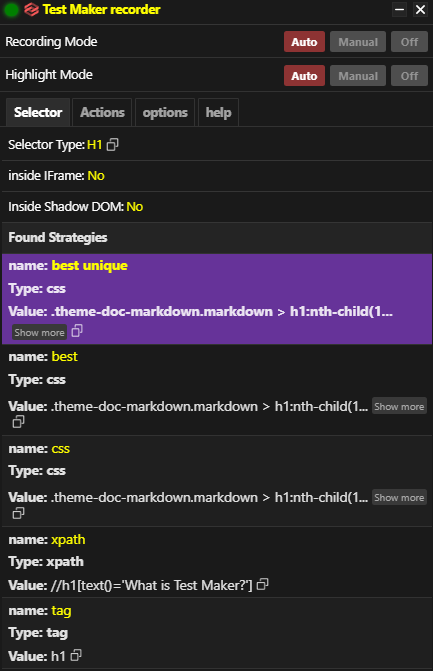
Highlighting an element allows you to focus on it within the recorder panel, where you can view its HTML attributes and ways to create a selector that points to it.
-
Auto: Any hovered element will be automatically highlighted, and the panel will be placed next to it.
-
Manual: You can highlight an element by hovering your mouse cursor over it and pressing the shift key twice on your keyboard. This will highlight the element and position the panel next to it.
-
Off: No element is highlighted.
Selector
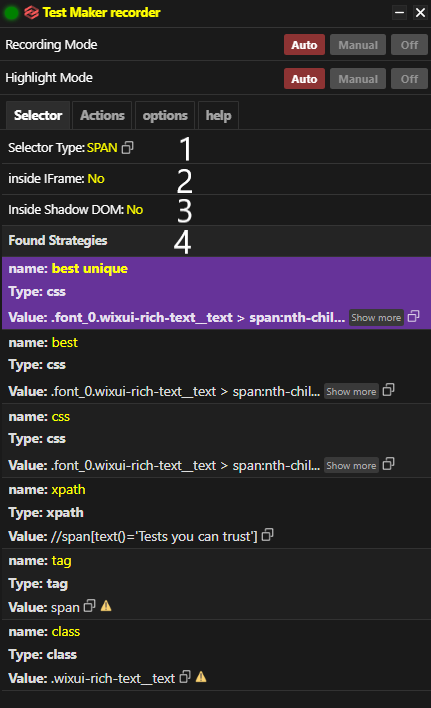
1. inside IFrame
Show whether or not the highlighted element is within an IFrame.
2. Selector Type
Show the highlighted element HTML type.
3. Inside Shadow DOM
Show whether or not the highlighted element is within Shadow DOM.
4. Strategies
In the Selector tab, you will find a crucial feature that complements the recorder. The Test Maker recorder panel displays all the HTML attributes of the highlighted element, allowing you to easily construct your own selector for that element and verify if it has the correct attributes. Additionally, an XPath pointing to the element is also provided. As a cherry on top, our internal algorithm selects and presents the best selector option for you to use.
All these selector options can be conveniently copied to the clipboard. Simply select the text with your mouse or click the button on the right.
If a displayed strategy is longer than the recorder panel default length, some part of it will be cut and hidden. You can click on Show more to have it expanded and to see the full strategy.
In cases where a selector option is not unique, a small warning triangle is displayed next to the selector, alerting you to the potential ambiguity.
Actions
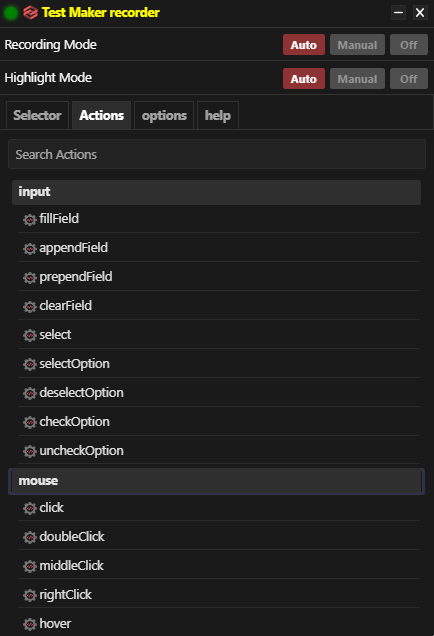
Inside this tab, you will find all Test Maker controller actions conveniently available for use. By simply clicking on an action, it will be automatically added to your code. If you perform this action while an element is highlighted, the selected action will be added with the highlighted element's selector as a parameter. On the other hand, if no element is highlighted, the action will be added with a generic placeholder "Selector," which needs to be replaced with the actual selector of your desired element. This streamlined process ensures that adding controller actions to your code is effortless and efficient.
This is what we consider using the recorder in manual mode.
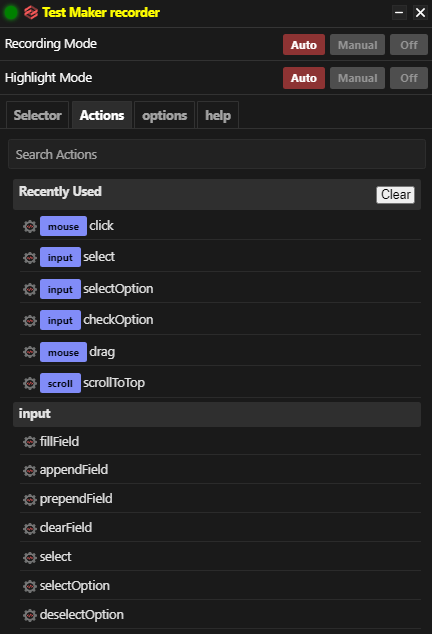
After using an action , you also have a tab appearing "Recently Used" that displays the 10 most recently used actions. A list that is clearable by the button "clear".