Recorder
The Test Maker recorder enables you to create test specifications for web testing by recording your actions in the web browser and translating them into Test Maker API commands. The recorder is designed to be non-destructive, allowing you to edit the recorded code while keeping the recording browser open.
How to use the recorder
Image of both tab inside extension op view
To create a new feature file, click on "Record a new feature." Provide a name for your new feature file, and it will be displayed in your project file tree.
Image of a generated feature file
Note that recording can only be done when your cursor is located inside a step. Please refer to the Gherkin file for more information on steps.
To start recording in an existing feature file, click on "Record in current active file" (assuming you have opened the designated file). This will open a terminal and initiate a recording session with the web browser displaying a blank page.
In the browser's navigation bar, enter the URL of the website you want to access.
Recorder panel
When you start a recording session and access a website, the Test Maker recorder panel will appear.
The recorder panel is your main tool during the recording process. For each recorded action, you will see a green notification message at the top of the browser window, confirming that the action was recorded successfully. If, for any reason, an action was not recorded, a red notification message will be displayed to alert you.
Recording Mode
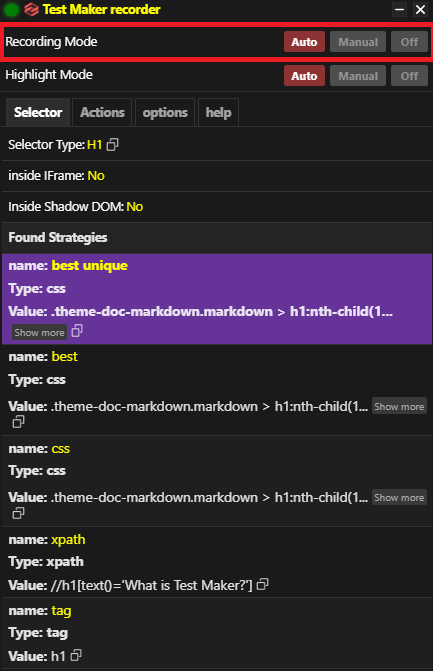
You can set the recording mode within the panel:
-
Auto: Your actions are automatically recorded and translated into commands.
-
Manual: You have control over which actions to record and translate into your feature file. If you interact with a selector during the action, it will be included in the generated code.
-
Off: None of your actions are recorded.
Highlight Mode

Highlighting an element allows you to focus on it within the recorder panel, where you can view its HTML attributes and ways to create a selector that points to it.
-
Auto: Any hovered element will be automatically highlighted, and the panel will be placed next to it.
-
Manual: You can highlight an element by hovering your mouse cursor over it and pressing the shift key twice on your keyboard. This will highlight the element and position the panel next to it.
-
Off: No element is highlighted.
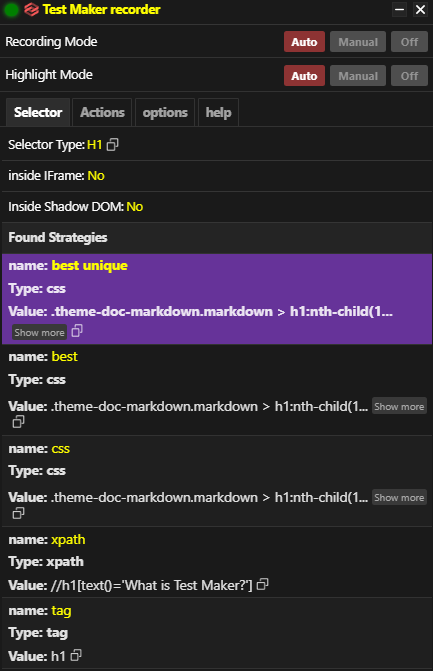
Selector
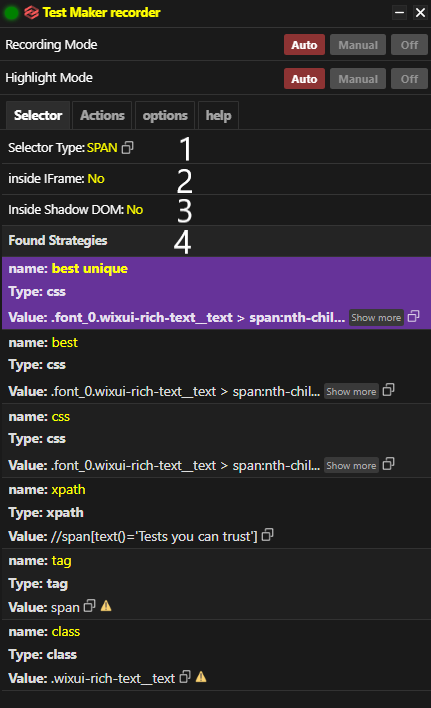
- inside IFrame
Show whether or not the highlighted element is within an IFrame.
- Selector Type
Show the highlighted element HTML type.
- Inside Shadow DOM
Show whether or not the highlighted element is within Shadow DOM.
- Strategies
In the Selector tab, you will find a crucial feature that complements the recorder. The Test Maker recorder panel displays all the HTML attributes of the highlighted element, allowing you to easily construct your own selector for that element and verify if it has the correct attributes. Additionally, an XPath pointing to the element is also provided. As a cherry on top, our internal algorithm selects and presents the best selector option for you to use.
All these selector options can be conveniently copied to the clipboard. Simply select the text with your mouse or click the button on the right.
In cases where a selector option is not unique, a small warning triangle is displayed next to the selector, alerting you to the potential ambiguity.
Actions
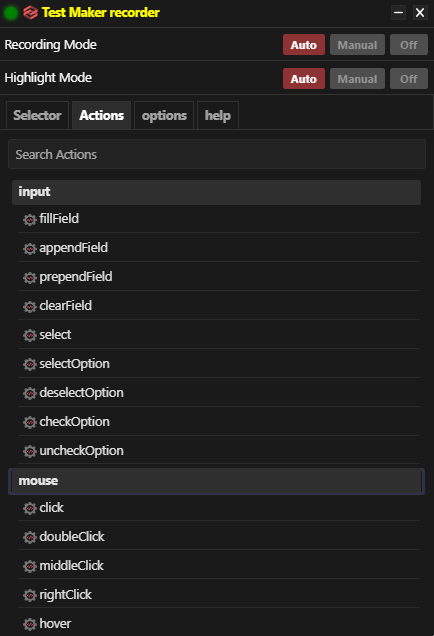
Inside this tab, you will find all Test Maker controller actions conveniently available for use. By simply clicking on an action, it will be automatically added to your code. If you perform this action while an element is highlighted, the selected action will be added with the highlighted element's selector as a parameter. On the other hand, if no element is highlighted, the action will be added with a generic placeholder "Selector," which needs to be replaced with the actual selector of your desired element. This streamlined process ensures that adding controller actions to your code is effortless and efficient.
This is what we consider using the recorder in manual mode.
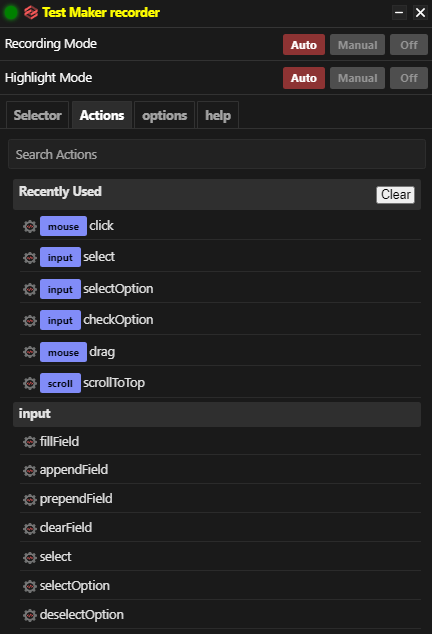
After using an action , you also have a tab appearing "Recently Used" that displays the 10 most recently used actions. A list that is clearable by the button "clear".
Options
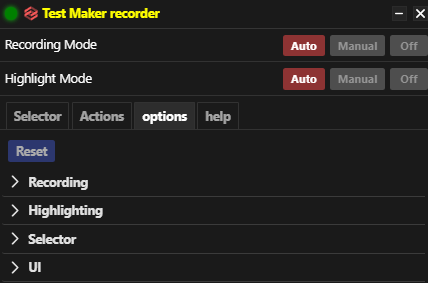
You have several options at your disposal relevant to visual experience and usage. These options provide flexibility and control over the recording, highlighting, and selector functionalities in Test Maker, allowing you to tailor your testing experience to your specific needs.
- Recording
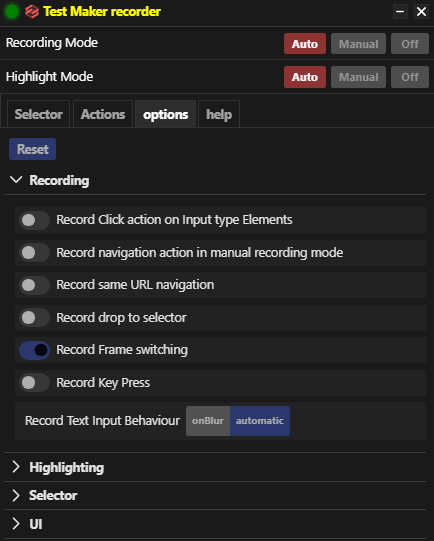
Record Click action on Input type Elements: Enabling this option allows clicks on input elements to be recorded and added to your spec file.
Record navigation action in manual recording mode: Enabling this option ensures that navigation actions are recorded only if they lead to another page.
Record same URL navigation: Enabling this option allows the recording of page refreshes or loading the same current page.
Record drop to selector: Enabling this option enables the recording of dragging an item to another element as a drag to selector action.
Record Frame switching: Enabling this option allows Test Maker to add actions that facilitate switching to a different frame and recording actions within that frame.
- Highlighting
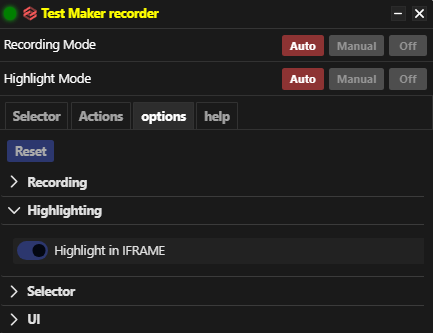
Highlight in IFRAME: Enabling this option enables highlighting elements inside an iframe.
- Selector
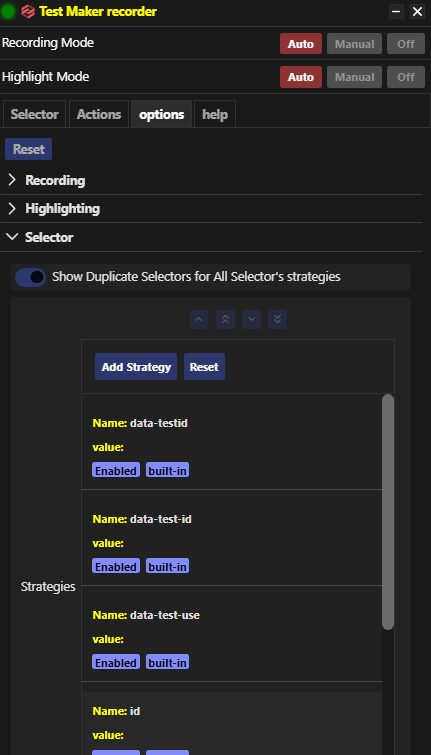
Show Duplicate Selectors for All Selector's strategies: Enabling this option displays a warning icon when an element selector is not unique, indicating the presence of duplicate selectors.
- UI
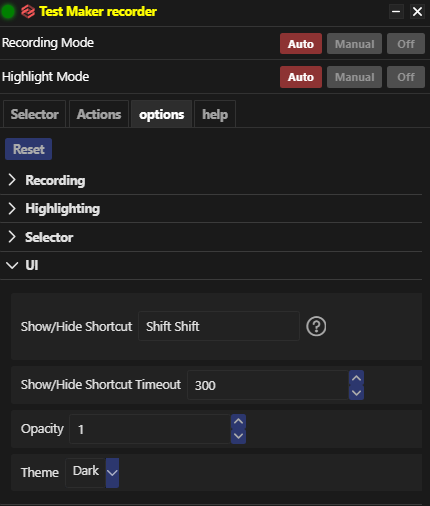
| Option | Value | Description |
|---|---|---|
Opacity | Number between 0 by increment of 0.1 | Set opacity of the recorder panel. |
Theme | Dark / Light | Switch between dark and light theme. |
You have the possibility to go back to your default settings by click on the Reset button.
Help
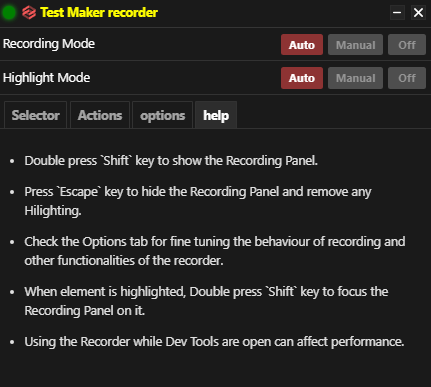
An additional helpful feature of Test Maker is the built-in "Help" tab, which provides useful tips and recommendations while using the recorder.With the Help tab, you can access relevant information and guidance right within Test Maker, making it easier to utilize the recorder effectively and accomplish your testing goals.