Selector
What is a Selector?
A selector is a function that identifies an element in your application. The selector API(full api here) provides methods and properties to select elements on the screen and get their state. You can use selectors to inspect elements state on the page, define Action targets, and Assertion actual values.
For example, when we are testing a web page, that web page consists of elements, like username field, password field, label, paragraph of text, etc.
We will definitely need to interact with those elements, you will need to provide a Selector to for example to execute I.click() action. This is where Test Maker Selector API comes into play.
Test Maker Selector API, is not just about finding elements and stabilizing this process, it provides many Actions to get information about the Selector like value, inner text, style, visibility, etc.
The Selector consists of 2 parts mainly:
- The Init
- The Actions
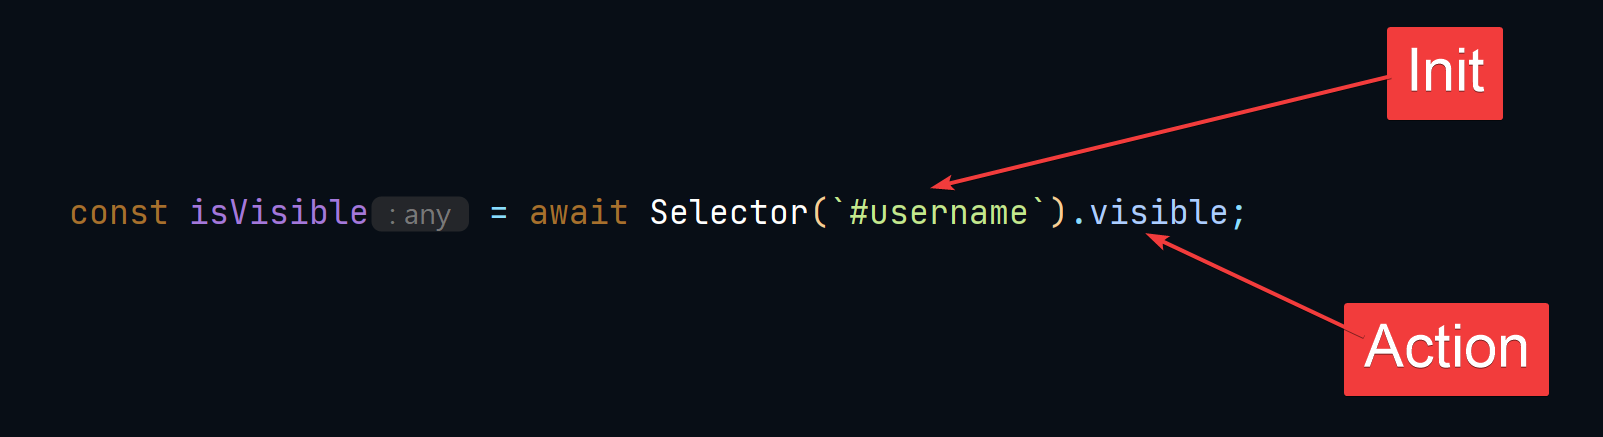
Let us explain the image above:
- We ask Test Maker to find an element with a "username" id.
- Now that we have found the element, we ask Test Maker to tell us if that element is visible or not.
The Init
This is where you let test Maker understand how would you want to locate the element on the screen. This is usually a standard syntax that is dependent on the Adapter you are using.
For example, if you are using an adapter that tests web pages like the Playwright Adapter, then you have two ways to define the init:
- CSS
- XPath
CSS and XPath are really rich set of grammar that would help you to find an Element on the screen using many conditions.
It is out of the scope of Test Maker documentation to teach CSS and XPath, but there are thousands of articles, videos on the net to cover that. It is highly recommended to go over some of them to grasp the basic concept of them. Here are some helpful resources for you:
The Actions
Test Maker Selector API comes with an extensive collection of Actions. These Actions can help you to further pinpoint the Selector or to get information about the Selector.
Smart Waiting
As with anything in life, things don't always happen when we want them 🙂 And this applies to Test Automation too.
Your Application is subject to many variables that affect its performance (like network, bad code, etc).
This means that sometimes, Elements on the screen don't show up at the exact time you want them! This is really one of the biggest issues that Test Automation Engineers face. And most of the time they resort to implicit waits, which is a kind of brute force solution for the issue.
Something like:
await I.wait(200);
In the test automation theory, you can find two types of waits: implicit (also known as hard wait) waits and explicit (also known as soft wait) waits.
But! Implicit wait introduces a few drawbacks as well. It increases the test script execution time as each of the commands would be ceased to wait for a stipulated amount of time before resuming the execution.
Thats why we really recommend applying explicit waits whenever its possible. Explicit waits are used to halt the execution until a particular condition is met or the maximum time has elapsed. Unlike Implicit waits, Explicit waits are applied for a particular instance only.
Having an implicit await is not always bad, sometimes you have no option and your Application behaves this way. But if there is a built-in solution for this issue why not to use it 😎.
Test Maker makes this a none existing issue with its Smart Waiting System 🤩
The way it works is that we auto wait for your Selector for a defined amount of time (it can be set globally and per Selector). If the element is not found immediately, Test Maker retries its attempts to find the element. Test fails if a defined time limit was reached and the element was never found.
If the element is present and was successfully found, test execution will be continued with next steps.